One's in the Stove...
A couple years back, we finished off a structure that was around here when we bought the place and made it into a shop. It turned out pretty nice, and since that time, we've been slowly moving things in and making it functional.
There has been one remaining finishing touch though, that is how to heat the building. The choices are wide and varied, and run the gamut from a few hundred dollars to a few thousand. Now being... what's the term... ah yes, broke, I started looking for the least expensive method. I was leaning toward a propane heater, but then gas prices went through the roof, and I reconsidered. The next option looked like electric, but the power company just raised their rates again, and that too became less appealing.
That left a wood burning stove as the last of the inexpensive options. But most stoves can be quite costly, and you have to feed 'em. So I was at an impass.
I happened to be visiting with a friend of mine who told me that his cousin made a wood stove out of a 55 gallon drum and that it did a great job of heating, and suggested I go online and find some plans. It was at this point that I decided that we'd found a winner, so I went online looking for the plans.
Strangely enough, there aren't that many out there, but I did find one site that said to forget the drum and use an old water heater. I was intrigued, and their argument made sense. So I downloaded the plans, and my buddy and I drove out to the junk pile because we remembered seeing a couple of old water heaters laying out there.
There were a couple of old heaters, but as we were browsing the junk hill, we saw a big piece of pipe. The pipe looked like it was an old compression coupler from who knows where, but it was about 20 inches inside diameter and 38 inches long with threaded flanges already welded on the ends. To top it all off, it was about 3/8" steel. The perfect fit for my little project.
The only flaw to my plan, was building a door for the front of it. The next morning at breakfast I told my dad what the story was, and he took me out into the shed and showed me a box that he'd had for about 25 years lying on a shelf. In the box was a kit to convert a 55 gallon drum into a wood stove. It had legs, a door, and a crown for the stovepipe. It was perfect. Sooooooo...
How to build a stove in 6 easy steps:
Step 1. Get all the pieces you need, by hook, crook, scavenging, etc. You will need some type of metal cylinder, and an assortment of metal to make the legs, top, ends, and smokestack.
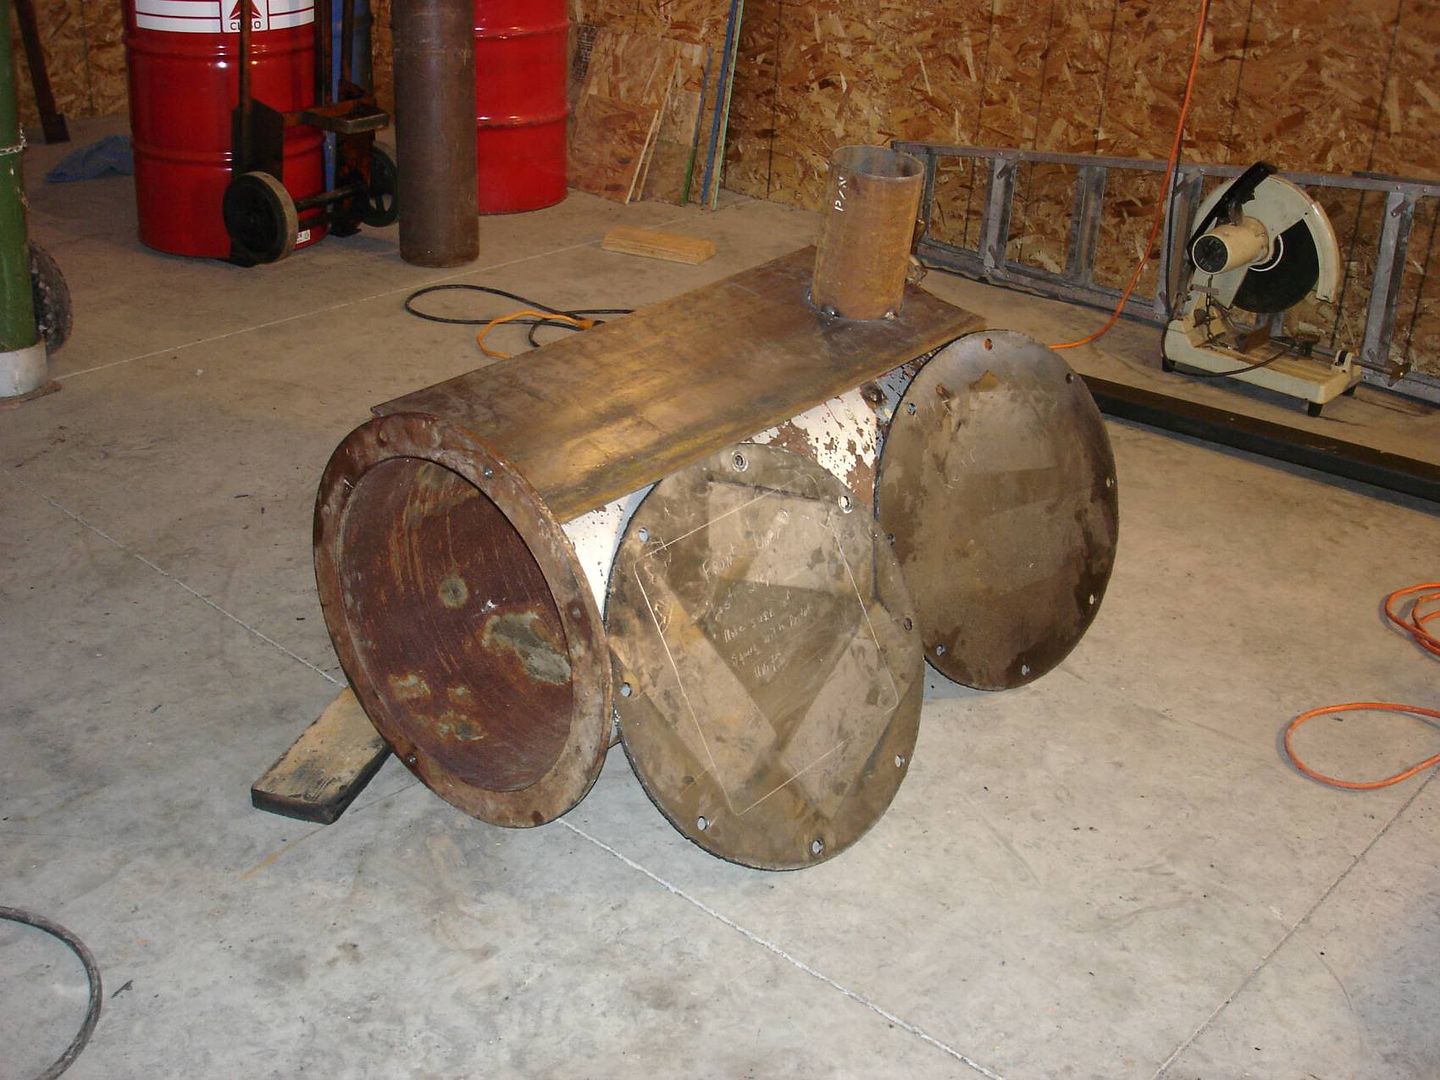
Step 2. Figure out what you want the stove to look like. Since my cylinder already had a hole in the top of it, I decided to put a flat piece of metal the whole length of the cylinder to give me a flat surface on the top, and to put the stovepipe on the end. (If you're actually going to do this, a word of advice-- The plans I downloaded called for a 6" O.D. (outside diameter) pipe for the smokestack. The stove pipe is to fit into it. This turns out to be an error. Your standard 6" single wall stovepipe is actually 6" O.D. That means that your smokestack and stovepipe will be the exact same diameter and will not fit inside one another. Your smokestack needs to be 6" I.D. (inside diameter) pipe. Learn from my mistake.) Once I figured out what I needed to do, I cut the flat plate, welded the smokestack into it, and cut the ends to size and drilled the holes to bolt them on. Here, take a look.
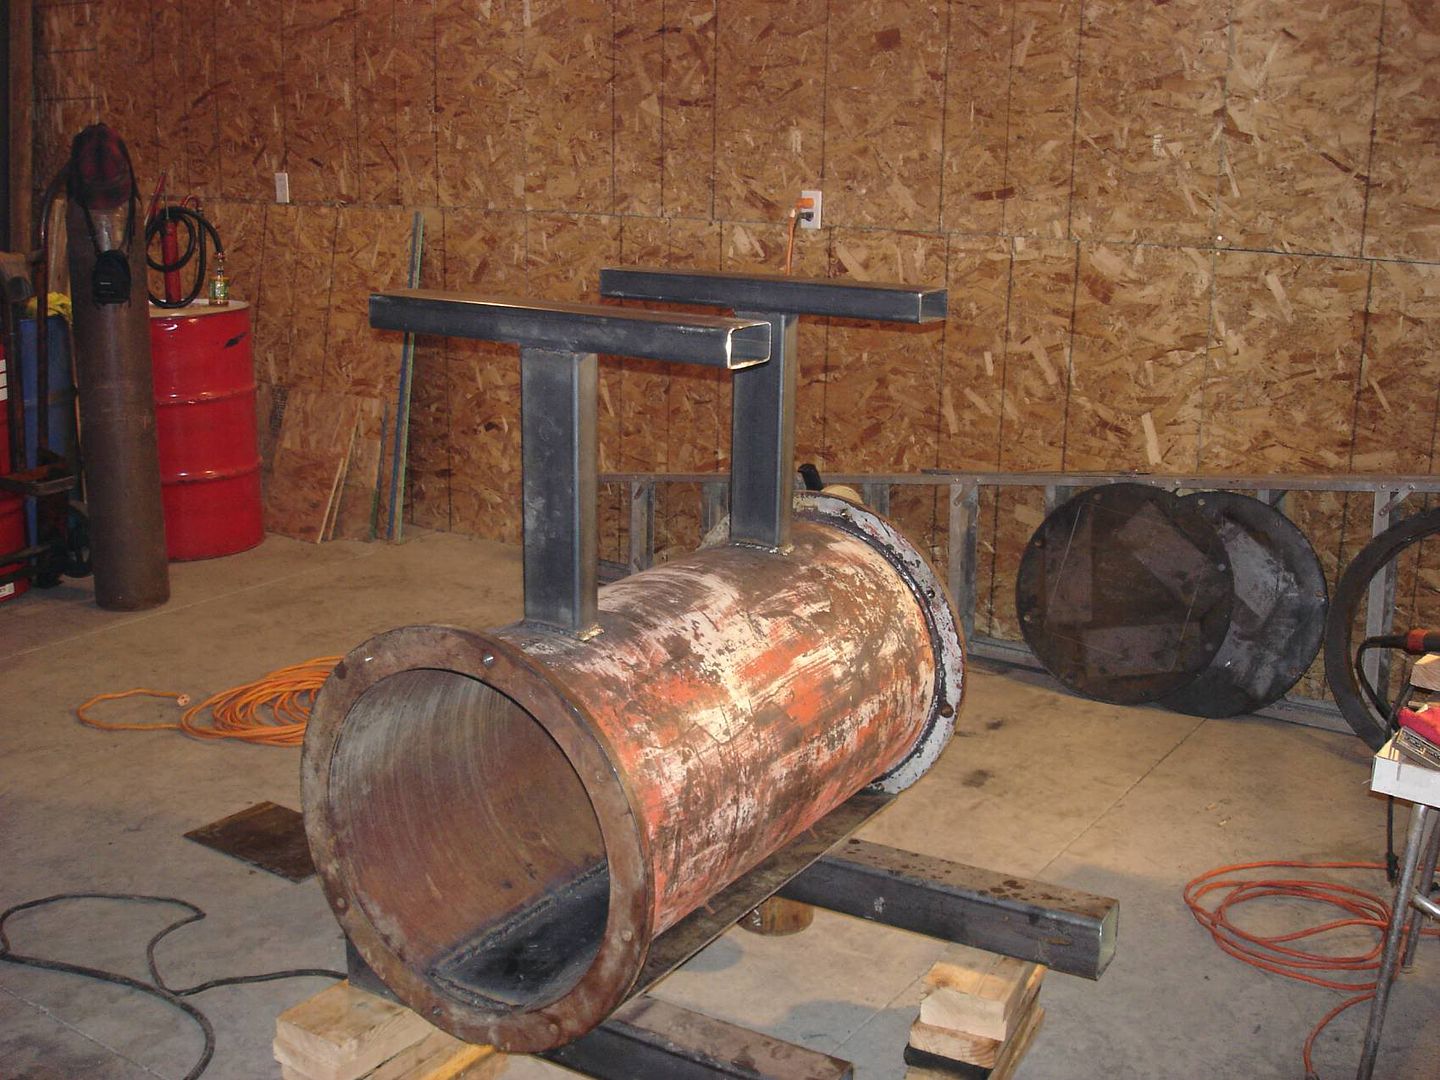
Step 3. Finish welding the smokestack and flat plate onto the cylinder, then turn the entire stove over and assemble your legs and weld them onto your cylinder. Take special care to make sure that the legs and your flat plate will sit perfectly parallell to each other. If you don't, your stove will rock back and forth and will be unstable, or else anything you put on the top of the stove will slide off.
Step 4. Turn the cylinder right-side up, and put the back on it. At this point, your stove should start to take shape.
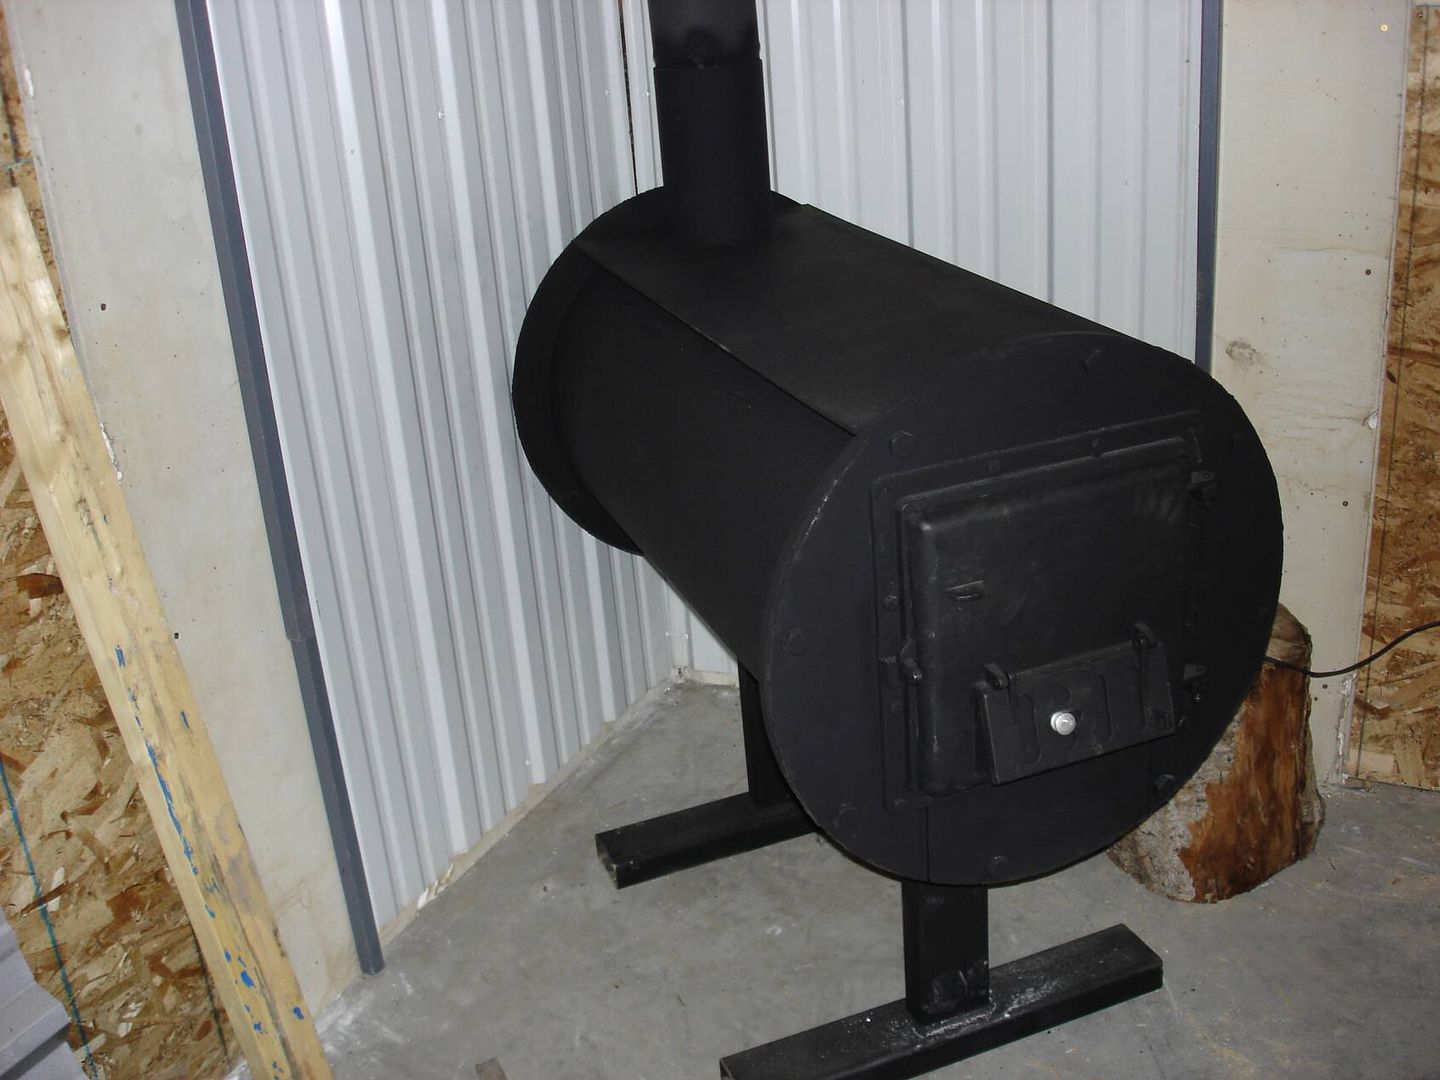
Step 5. Put the front on the stove, mark out where the door should go, and install the door. Make sure that your door frame is also exactly parallell to the top plate and legs. If it's out of parallell one direction or the other, the door will either swing open or closed when you don't want it to. After you get the door bolted on, you should be able to open the door and cut out the opening in the front plate where you will load the wood. Now it's really looking like a wood stove.
Step 6. Now it's time to figure out where you want to put it in the building. Once you get it in place, you need to plum it in, put up any necessary firewalls behind it, add a little flat black hi-temp paint, and voila!
Now all you've got to do is to pack copious amounts of wood into the hungry beast and enjoy the warmth and smell of the fire.
Now where did I put those marshmallows...
There has been one remaining finishing touch though, that is how to heat the building. The choices are wide and varied, and run the gamut from a few hundred dollars to a few thousand. Now being... what's the term... ah yes, broke, I started looking for the least expensive method. I was leaning toward a propane heater, but then gas prices went through the roof, and I reconsidered. The next option looked like electric, but the power company just raised their rates again, and that too became less appealing.
That left a wood burning stove as the last of the inexpensive options. But most stoves can be quite costly, and you have to feed 'em. So I was at an impass.
I happened to be visiting with a friend of mine who told me that his cousin made a wood stove out of a 55 gallon drum and that it did a great job of heating, and suggested I go online and find some plans. It was at this point that I decided that we'd found a winner, so I went online looking for the plans.
Strangely enough, there aren't that many out there, but I did find one site that said to forget the drum and use an old water heater. I was intrigued, and their argument made sense. So I downloaded the plans, and my buddy and I drove out to the junk pile because we remembered seeing a couple of old water heaters laying out there.
There were a couple of old heaters, but as we were browsing the junk hill, we saw a big piece of pipe. The pipe looked like it was an old compression coupler from who knows where, but it was about 20 inches inside diameter and 38 inches long with threaded flanges already welded on the ends. To top it all off, it was about 3/8" steel. The perfect fit for my little project.
The only flaw to my plan, was building a door for the front of it. The next morning at breakfast I told my dad what the story was, and he took me out into the shed and showed me a box that he'd had for about 25 years lying on a shelf. In the box was a kit to convert a 55 gallon drum into a wood stove. It had legs, a door, and a crown for the stovepipe. It was perfect. Sooooooo...
How to build a stove in 6 easy steps:
Step 1. Get all the pieces you need, by hook, crook, scavenging, etc. You will need some type of metal cylinder, and an assortment of metal to make the legs, top, ends, and smokestack.
Step 2. Figure out what you want the stove to look like. Since my cylinder already had a hole in the top of it, I decided to put a flat piece of metal the whole length of the cylinder to give me a flat surface on the top, and to put the stovepipe on the end. (If you're actually going to do this, a word of advice-- The plans I downloaded called for a 6" O.D. (outside diameter) pipe for the smokestack. The stove pipe is to fit into it. This turns out to be an error. Your standard 6" single wall stovepipe is actually 6" O.D. That means that your smokestack and stovepipe will be the exact same diameter and will not fit inside one another. Your smokestack needs to be 6" I.D. (inside diameter) pipe. Learn from my mistake.) Once I figured out what I needed to do, I cut the flat plate, welded the smokestack into it, and cut the ends to size and drilled the holes to bolt them on. Here, take a look.
Step 3. Finish welding the smokestack and flat plate onto the cylinder, then turn the entire stove over and assemble your legs and weld them onto your cylinder. Take special care to make sure that the legs and your flat plate will sit perfectly parallell to each other. If you don't, your stove will rock back and forth and will be unstable, or else anything you put on the top of the stove will slide off.
Step 4. Turn the cylinder right-side up, and put the back on it. At this point, your stove should start to take shape.
Step 5. Put the front on the stove, mark out where the door should go, and install the door. Make sure that your door frame is also exactly parallell to the top plate and legs. If it's out of parallell one direction or the other, the door will either swing open or closed when you don't want it to. After you get the door bolted on, you should be able to open the door and cut out the opening in the front plate where you will load the wood. Now it's really looking like a wood stove.
Step 6. Now it's time to figure out where you want to put it in the building. Once you get it in place, you need to plum it in, put up any necessary firewalls behind it, add a little flat black hi-temp paint, and voila!
Now all you've got to do is to pack copious amounts of wood into the hungry beast and enjoy the warmth and smell of the fire.
Now where did I put those marshmallows...
posted by LL at 6:34 PM
![]()


6 Comments:
Very cool!!!! I really like that idea. My parents used to heat the house via woodstove in the basement that they hod hooked up to the hot water tank and the hot water baseboards. Saved ALOT on heating bills and was regulated safe by the building inspectors. We did this for over 20 years until they sold the house. The current owner still uses it.
Awesome work and kudos for you. :o)
It's not everyone who would have a wood stove kit lying around for 20+ years. It would be interesting to see what else your old man has stashed away.
A moonshine kit?
"Awesome work and kudos for you."
Thankyouthankyou... *takes bow*
"It would be interesting to see what else your old man has stashed away."
No it wouldn't. Trust me, I've grown up here. If it's semi-worthless, I'm sure it's around here somewhere. But I suppose you're more than welcome to come out and browse to your heart's content.
Now the place I live, that's a different story. There's about 4 generations of an accumulation of crap. Of course some call them antiques... :P
" A moonshine kit?"
Now THAT I wouldn't mind finding...
I admire people like you. It makes me want to get up out of this armchair, grab my toolbox, and…
Aw, who am I kidding?
ZZZZZZZZZZZzzzzzzzzzzzzzzzzzzzzz…
I would like to know what's the name of the kit you used the door looks bigger than the kits that are out now if you get this please email me at antalston25@gmail.com thank you
Post a Comment
<< Home